Last updated November 18, 2026








Free written scope consultation - allowances, timeline, and change-order rules on paper before a single trade is scheduled
Bathroom Remodeling Maintenance Schedule: What to Do and When
Kendall’s water hardness and 90% summer humidity don’t care that your bathroom was just remodeled. Without a climate-specific maintenance routine, a five-year finish starts looking like a two-year finish. We’ve walked into Kendall homes where a bathroom finished two winters ago already shows mildew in the grout lines and soft caulk at the tub base – not because the work was bad, but because the homeowner followed generic advice written for Arizona. This guide gives you a month-by-month schedule built for South Florida’s moisture, our hard water, and the way air actually moves through Kendall houses. You’ll learn what to check, when to seal, which cleaners wreck your sealer, and what keeps your workmanship guarantee intact.
Quick Answer
In South Florida, a newly remodeled bathroom needs grout sealer reapplied every 6 to 9 months instead of the 12 to 24 months manufacturers print, caulk joints checked quarterly, hard water scale removed weekly with pH-neutral cleaners, and exhaust fan performance tested once a year. Build a first-year schedule around those four jobs, and your tile, grout, and fixtures last their full service life instead of failing early.
Styles & brands we work with
- Kitchen remodeling
- Bathroom remodeling
- Home additions & ADU
- Roofing
- Windows & doors
- Driveway & pavers
- Fence
Table of Contents
- The Month-by-Month First-Year Checklist
- When Does Grout Sealer Need Reapplication in a Humid Climate?
- How to Monitor Caulk Joints at Tub-to-Tile and Floor-to-Wall Transitions
- Managing Hard Water Scale Without Damaging Sealed Grout
- How to Test Your Exhaust Fan Every Year (and Why It Matters Most)
- What Preserves Your Workmanship Guarantee and What Could Void It
- Seasonal Rhythms: What Changes in Wet Season vs. Dry Season
- Common Mistakes to Avoid
The Month-by-Month First-Year Checklist
The first twelve months after a bathroom remodel is when you establish habits. Materials are still settling, grout is curing fully, and sealers are doing their first real work against Kendall’s humidity. Here’s the schedule we suggest to homeowners after we finish a job. Print it, tape it inside the vanity door.
- Month 1: Wipe down all caulk lines with a damp cloth. Note anywhere water pools and doesn’t drain. Take a photo of every joint so you have a baseline to compare against later.
- Month 2: First full clean of tile and grout with a pH-neutral cleaner. No vinegar, no bleach on sealed surfaces. Check that the exhaust fan pulls a tissue against the grille.
- Month 3: Inspect the tub-to-tile caulk line and the floor-to-wall transition. Press gently with a fingertip. If it feels soft or pulls away, that’s early failure – document it.
- Month 4: Descale showerhead and faucet aerators by soaking in a 50/50 white vinegar and water solution (fixtures only – never grout). This removes the calcium buildup that Kendall’s water leaves fast.
- Month 5: First grout sealer touch-up on high-traffic zones: shower floor, the wall behind the toilet, and around the tub. A water-drop test tells you if it’s needed (more on that below).
- Month 6: Deep-clean exhaust fan grille. Vacuum the intake. Check the fan’s exterior vent flap opens when running. If it doesn’t, airflow is restricted.
- Month 7: Full grout sealer reapplication. In South Florida humidity this is your first real re-seal – not the 12-month mark the bottle suggests.
- Month 9: Inspect caulk a second time. South Florida caulk can start to crack in 6 to 9 months, so re-inspect every quarter.
- Month 12: Annual exhaust fan performance test (see the dedicated section). Full ceiling-to-floor inspection with photos. Compare to Month 1 photos for early warning signs.
Year two and beyond, most of this collapses into a simple rhythm: seal twice a year, check caulk quarterly, descale weekly, test the fan every spring. That’s it. The first year is when you’re learning what your specific bathroom does – every house in Kendall behaves a little differently based on which side it faces, how shaded it is, and how many people use the shower each morning.
When Does Grout Sealer Need Reapplication in a Humid Climate?
Grout sealer in Kendall needs its first reapplication at roughly 6 to 9 months, not the 12 to 24 months printed on most products. Sealer wears from water exposure, cleaning friction, and humidity cycling. In South Florida, your shower cycles between wet and damp more times per week than in drier climates, and the grout never quite dries out between uses. That constant moisture load is what ages sealer faster.
You don’t have to guess. Do the water-drop test:
- Drip a few drops of water on a grout line in the shower floor, a vertical wall joint, and near the toilet.
- Wait 5 minutes. If the water beads up and sits on the surface, the sealer is intact.
- If water darkens the grout or soaks in, the sealer has failed in that zone.
- Reapply only where the test shows failure – you don’t need to reseal the entire bathroom at once.
We use penetrating sealers on the showers we install in Kendall because they soak into the grout rather than sitting on top. Topical sealers form a film that can yellow and peel under high humidity, which is exactly the wrong failure mode for South Florida. When you buy a sealer, ask for a penetrating product labeled for wet areas and verify it says “penetrating” on the label, not just “sealer.”
If you’re comparing a new bathroom installation to an existing one, our guide to bathroom remodeling in Kendall walks through the substrate and waterproofing decisions behind the grout, which is where the long-term water resistance actually starts.
How to Monitor Caulk Joints at Tub-to-Tile and Floor-to-Wall Transitions
Caulk joints fail faster in South Florida than manufacturer timelines predict – often in 6 to 12 months rather than 3 to 5 years. That’s because those joints expand and contract every time you run hot water, and Kendall’s year-round humidity keeps them from fully drying between cycles. Two transitions to watch: the tub-to-tile line and the floor-to-wall joint.
Check both quarterly with three simple tests:
- The press test. Press a fingertip into the caulk. It should feel firm and slightly rubbery. If it feels spongy or your finger leaves a dent that doesn’t spring back, moisture is trapped behind it.
- The water test. Run the shower for five minutes, then look at the caulk line. If water pools in a low spot or you see darkening behind the caulk, water is getting where it shouldn’t.
- The peel test (eyes only). Look for a hairline gap between the caulk and tile or tub. Any gap, no matter how small, is a water intrusion point and needs resealing.
When you do reseal, use 100% silicone caulk, not paintable latex – latex breaks down faster under humidity. Remove the old caulk completely before applying new. A common mistake we’ve seen: homeowners caulk over failed caulk. It looks fine for a month and then peels off in strips. Moisture trapped between the two layers is the culprit.
If you’re noticing these symptoms shortly after a remodel, that’s a conversation to have with your contractor, not a weekend DIY project. On our jobs, the caulk joint standard is part of the finished work covered by our written guarantee – we come back and re-do failing caulk within the guarantee period at no charge. Our team covers the details of that in our general contractor in Kendall overview.
Managing Hard Water Scale Without Damaging Sealed Grout
Kendall’s municipal water runs hard – heavy with calcium and magnesium that leaves white scale fast on glass, fixtures, and grout. Left alone, that scale etches into grout and turns a fresh remodel gray within a year. But the cleaners most people reach for to fight scale are the same ones that destroy sealer and accelerate water intrusion.
What’s safe on sealed grout and tile:
- pH-neutral tile and stone cleaners (labeled as such)
- Mild dish soap and warm water for routine cleaning
- A soft nylon brush, never steel wool or abrasive pads
- For fixture descaling: 50/50 white vinegar and water, applied to fixtures only, then rinsed
What degrades the sealer and shortens grout life:
- Vinegar or any acid directly on grout – it eats sealer and can etch the grout itself
- Bleach-based cleaners on grout – they strip sealer and bleach color out over time
- Ammonia-based glass cleaners running down onto tile – they attack sealer
- Tub-and-tile “scrubbing” products with abrasives – they micro-scratch sealer film
The best anti-scale defense is regular descaling, not aggressive cleaning. Wipe down shower walls with a squeegee after each use. That one habit – 20 seconds per shower – cuts scale buildup more than any product. If water quality is a persistent battle in your house, a whole-home water softener or a showerhead filter is worth considering; some of the fixtures we install, like Kohler and Moen models, come in versions designed for hard-water performance. We’re happy to talk through the options during the remodel.
How to Test Your Exhaust Fan Every Year (and Why It Matters Most)
An undersized exhaust fan is the single most common root cause of premature bathroom deterioration in Kendall homes. Bath fans are often sized for a smaller bathroom or older code minimums, and in a South Florida house they’re asked to do more work – they’re pulling out triple the moisture a dry-climate fan handles. If your fan isn’t actually moving enough air, moisture lingers, grout seals fail faster, paint peels, and mold takes hold inside walls.
Here’s the annual test:
- The tissue test. Hold a single square of toilet paper up to the fan grille while the fan runs. It should stick firmly. If it falls, airflow is too weak.
- The tissue-and-timer test. Wet the back of your hand and hold it near the fan. It should dry in under a minute. If it stays damp, the fan isn’t removing humidity.
- The exterior vent check. Go outside and look at where the fan exhausts through the wall or roof. The flap should open freely when the fan is on. If it’s stuck, clogged, or covered, air is pushing back into the house.
- The grille clean. Remove the grille (usually pulls off or has two small tabs) and vacuum the intake. Dust buildup cuts airflow 20-30% in neglected fans.
- The runtime check. Run the fan 20 minutes after every shower – not 5. In South Florida humidity, 20 minutes is the minimum for moisture control, and a timer switch makes it automatic.
If the fan fails the tissue test after cleaning, it’s likely undersized for the room. A fan rated for 50 CFM in a 10×10 bathroom isn’t enough for the moisture load Kendall produces. When we remodel bathrooms here, we size the fan to the room volume and recommend timer switches as standard, because a fan you have to remember to turn off is a fan that’s always underperforming. The relationship between airflow and the finishes is covered as part of our bathroom remodeling in Kendall process.
What Preserves Your Workmanship Guarantee and What Could Void It
Every project we complete at Penhallow Remodeling Kendall comes with our 365-Day Done Right Promise – if the work fails inside the guarantee period, we come back and fix it at no charge, in writing. Understanding what keeps that guarantee intact matters, because the guarantee covers defects in our work, not damage from outside causes or misuse.
What keeps the guarantee intact:
- Using pH-neutral cleaners and avoiding acids and bleach on grout
- Reporting issues (failing caulk, popped tile, leaking fixture) as soon as you see them
- Running the exhaust fan 20 minutes after showers
- Following the sealer schedule we recommend at handover
- Not attempting your own repairs on warrantied elements before calling us
What could void coverage on a specific element:
- Using acid-based or abrasive cleaners on warrantied tile and grout
- Patching or recaulking areas we installed with a different product than the one we used
- Re-sealing grout with a topical sealer over a penetrating one we applied
- Letting a known leak or crack go unreported until the damage spreads
Here’s the fair part: if a repair we made fails inside the guarantee period, we come back for free. No service call fee, no re-inspection charge. That’s true on every project, and it’s the reason our free estimate conversation always includes a walkthrough of what’s covered and what isn’t before work starts.
Seasonal Rhythms: What Changes in Wet Season vs. Dry Season
South Florida’s wet season runs roughly May through October. Humidity climbs, daily afternoon storms hit, and your bathroom’s interior moisture load goes up right when the outside air is already saturated. This is when you front-load the maintenance.
- Wet season (May-October): Run fans longer – 30 minutes after showers. Check caulk joints monthly instead of quarterly. Watch for mildew in corners and along the shower floor perimeter. Descaling matters more because water is used more.
- Dry season (November-April): This is the best time for grout sealer reapplication, since the grout can dry fully between cleaning and sealing. Inspect for cracks that opened during the wet season. Touch up caulk in the window where humidity is lowest.
If your bathroom faces west and gets direct afternoon sun, expect faster wear on the window-side caulk and paint. If your bathroom is interior with no window, the exhaust fan carries 100% of the moisture removal – which makes the annual fan test non-negotiable. Every house in Kendall has its own pattern.
Common Mistakes to Avoid
- Following the sealer bottle’s 12-month timeline. In South Florida’s humidity, sealer wears twice as fast. Test with the water drop method every 6 months instead.
- Using vinegar on sealed grout. It eats sealer and etches grout – vinegar is for fixtures only, diluted 50/50 and rinsed.
- Caucocking over old caulk. It fails within weeks. Remove the old caulk completely before applying new.
- Running the exhaust fan for 5 minutes instead of 20. In Kendall, that leaves moisture trapped inside the walls. Use a timer switch.
- Assuming your fan is sized right. Many Kendall homes have fans sized for a smaller or older bathroom. Test airflow once a year.
- Ignoring the first sign of soft caulk or darkening grout. By the time it’s visible on the surface, moisture has been inside for weeks. Call early.
- Doing your own repair on warrantied work. Our guarantee covers defects in our work – but if you’ve patched the same area with a different product, the warranty claim gets complicated. Call us first.
See the difference
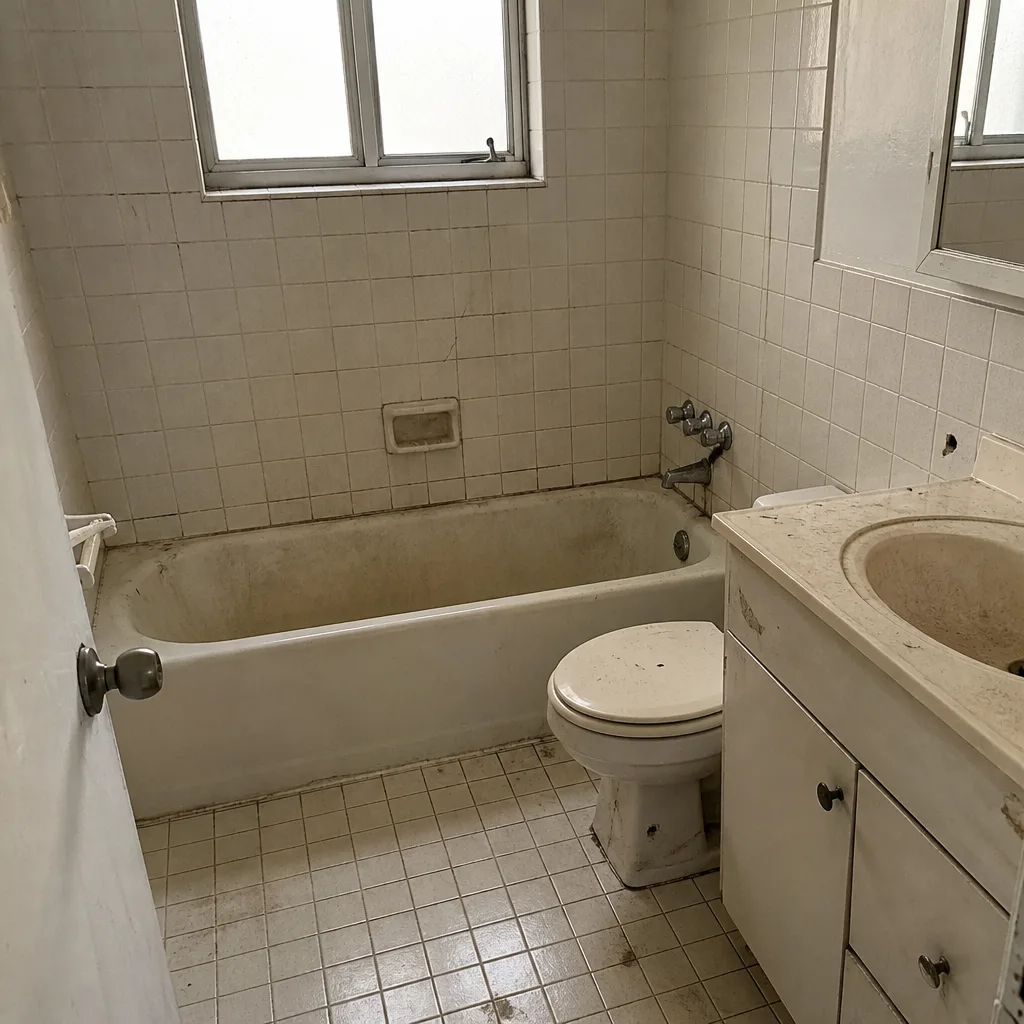 Before
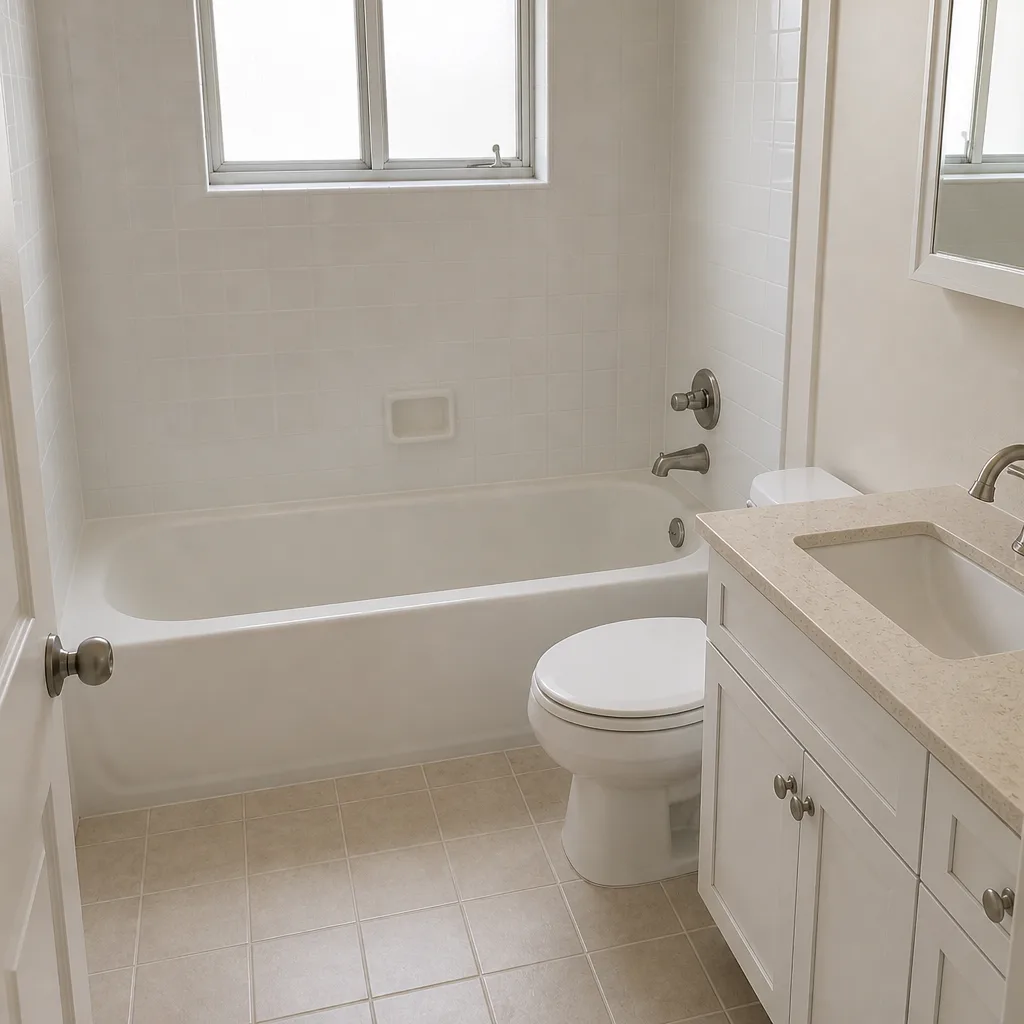 After
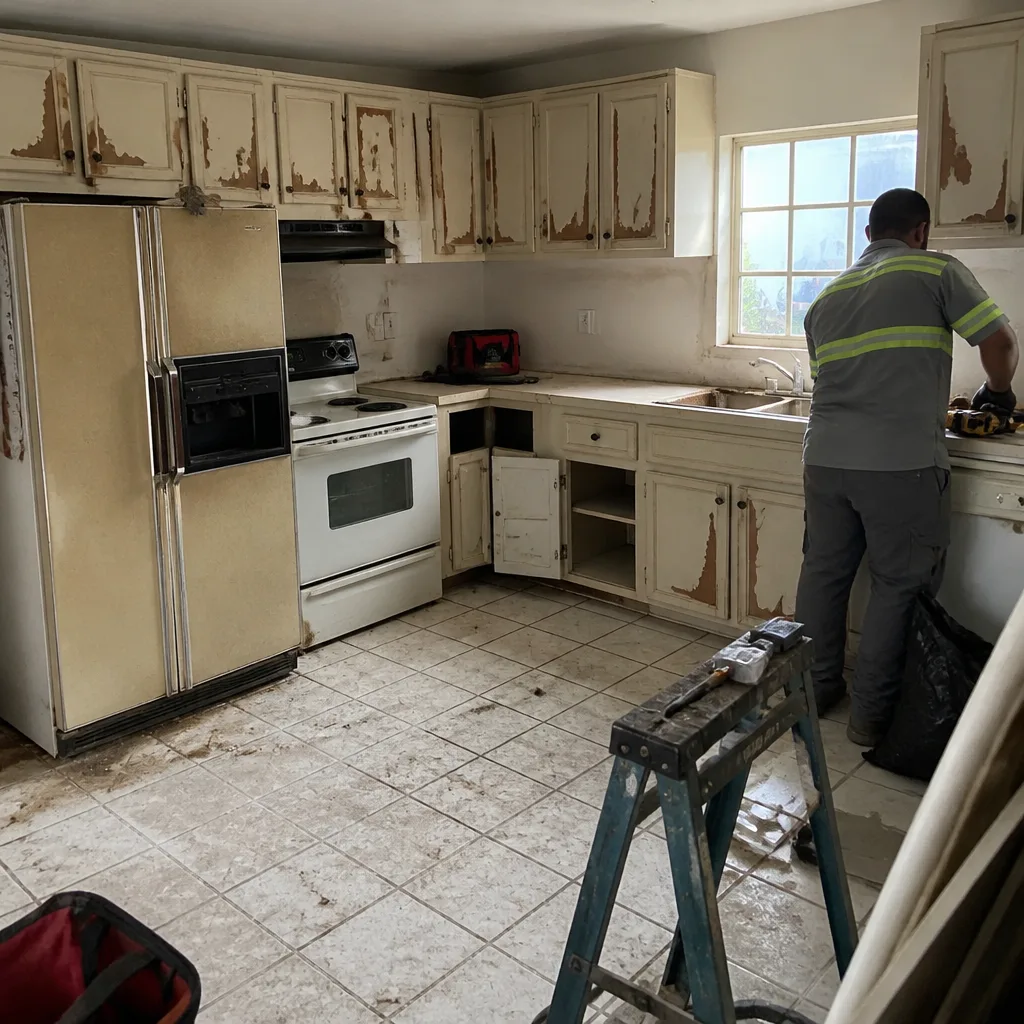 Before
 After
 Before
 After
When to Call a Professional
Some maintenance is homeowner territory: cleaning, descaling, running the fan, resealing grout with a penetrating product. Other things want a professional eye. Call us if you see soft or peeling caulk at the tub-to-tile line, darkening on a grout line near the shower floor, a fan that fails the tissue test after cleaning, popped or loose tile, water stains on the ceiling below the bathroom, or a fixture leak you can’t trace. These are signs that moisture has gotten behind the finish, and the earlier we look, the smaller the repair. Penhallow Remodeling Kendall offers free estimates in Kendall – call (844) 560-5417 to schedule.
Frequently Asked Questions
Reseal every 6 to 9 months in South Florida, compared to 12 to 24 months in dry climates. Test with a few drops of water: if water soaks in instead of beading up, it’s time. High humidity and year-round shower use accelerate sealer breakdown. Call (844) 560-5417 if you’d like us to walk through your specific bathroom – estimates are free.
Use a pH-neutral tile and stone cleaner with a soft nylon brush, and skip vinegar, bleach, and abrasive scrubbers on grout. Acid and abrasive cleaners strip sealer and etch grout. Vinegar is fine on fixtures (diluted) but never on sealed grout. Call (844) 560-5417 if you’re unsure which cleaner works on your specific grout.
Kendall’s humidity plus daily hot-water cycles cause caulk to expand and contract more than in drier climates, so joints fail in 6 to 12 months instead of the 3 to 5 years the label claims. Check quarterly, reseal with 100% silicone, and never caulk over the old caulk. Call (844) 560-5417 if the caulk failure is within a year of remodeling.
Hold a square of toilet paper up to the running grille – it should stick firmly. If it falls, airflow is too weak. In Kendall, fans are often undersized for the room and the moisture load. Call (844) 560-5417 to schedule a walkthrough if the fan fails the test after cleaning.
Our 365-Day Done Right Promise covers defects in our work – it doesn’t cover damage from acid cleaners, owner patching on warrantied areas, or unreported leaks. Use pH-neutral cleaners, report issues early, and call us before patching anything covered. Call (844) 560-5417 with any question about what’s covered – we’ll tell you plainly.
Yes. Bathroom remodels that move plumbing, electrical, or walls require permits in Miami-Dade County, and we pull them and pass inspection as part of the job. Our written price includes the permit cost – no surprise line items. Call (844) 560-5417 to schedule a free estimate.
The Bottom Line
A South Florida bathroom doesn’t need more maintenance than one anywhere else – it needs different maintenance. Seal grout twice as often. Check caulk quarterly. Descale weekly with pH-neutral cleaners. Test your exhaust fan every year. Run the fan for 20 minutes after every shower, not 5. That’s the whole schedule, and it protects the money you spent on the remodel by years, not months. If you’re comparing remodel options or want a written price on a maintenance-adjacent repair, our Penhallow Remodeling Kendall home page and our kitchen remodeling in Kendall guide cover how we work. Then call (844) 560-5417 for a free estimate – we answer 24/7, a real person picks up, and every quote is written before any work starts.
Written by the team at Penhallow Remodeling Kendall.